
Introduction
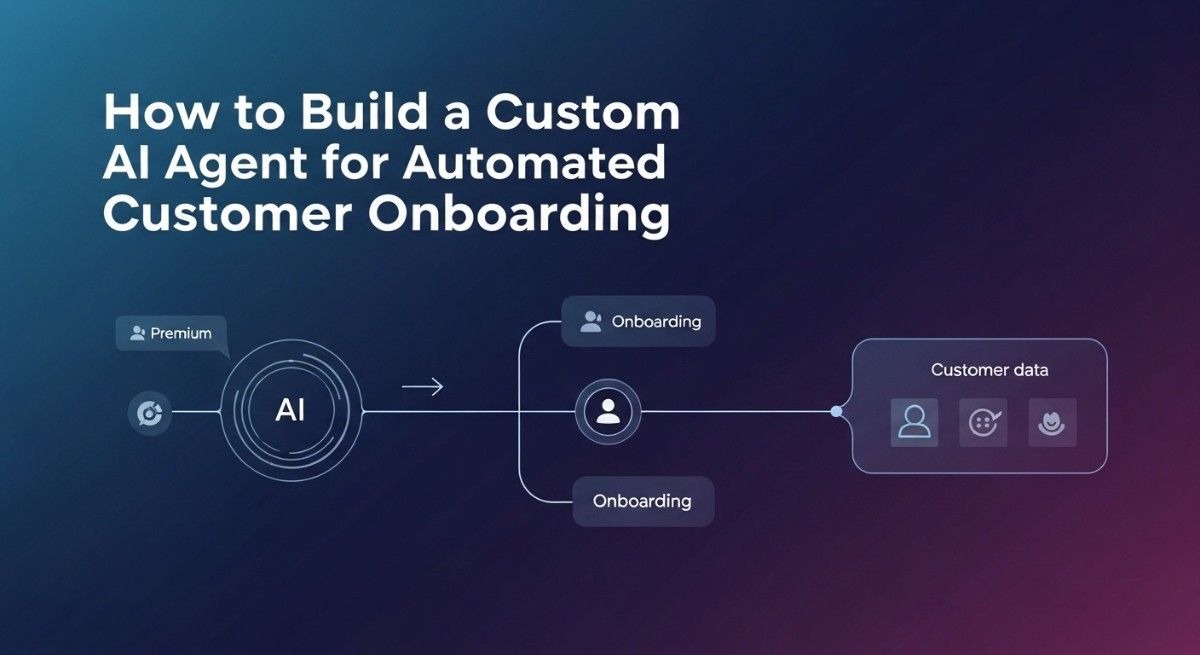
TL;DR Customer onboarding is broken at most companies. New users sign up, hit a wall of forms and waiting periods, and churn before they ever see value. The fix is not hiring more support staff. The fix is to build a custom AI agent for automated customer onboarding. This guide walks through every step of that process. You will understand what it takes, what tools to use, and how to ship something that actually works.
Table of Contents
Why Automated Customer Onboarding Needs an AI Agent
Traditional onboarding relies on humans at every step. A sales rep sends a welcome email. A success manager schedules a call. A support agent answers the same questions day after day. This model does not scale. It burns out your team and slows down your customers.
An AI agent changes the equation entirely. It works around the clock. It never forgets a step. It personalizes interactions based on user data. Most importantly, it handles hundreds of customers at once without adding headcount.
The decision to build a custom AI agent for automated customer onboarding is a strategic one. Off-the-shelf chatbots do not cut it for complex onboarding flows. Your business has unique steps, unique data, and unique customer needs. A custom agent fits your workflow perfectly. Generic tools force you to fit theirs.
Companies that invest in this approach see measurable results fast. Onboarding completion rates go up. Time-to-value drops. Support ticket volume decreases. Customer satisfaction scores improve. The ROI of a well-built onboarding agent is not hard to prove.
What Exactly Is a Custom AI Agent?
Defining an AI Agent
An AI agent is a software system that perceives its environment and takes actions to reach a goal. It is not a simple chatbot that follows a script. An agent reasons about what to do next. It uses tools, accesses data, and adjusts its behavior based on context.
A customer onboarding agent specifically handles the journey from signup to activation. It greets new users, collects required information, verifies identities, explains features, answers questions, and confirms that setup steps are complete. It does all of this autonomously.
Custom vs. Off-the-Shelf Agents
Off-the-shelf onboarding tools give you templates and fixed flows. They work for simple use cases. A SaaS tool with three setup steps might get by with a generic chatbot. A fintech company with KYC requirements, document uploads, and regulatory checks needs something purpose-built.
When you build a custom AI agent for automated customer onboarding, you control every detail. You define the steps, the logic, the fallbacks, and the integrations. The agent reflects your brand voice. It connects to your CRM, your database, and your notification systems. That level of control produces a better customer experience.
Planning Your AI Onboarding Agent
Map the Existing Onboarding Journey
Before writing a single line of code, map out what onboarding looks like today. Talk to your customer success team. Review support tickets from new users. Identify every step a customer takes from signup to full activation. Write it all down in order.
Look for friction points in that map. Where do customers get stuck? Where do they ask for help? Where do they drop off? These are the moments your agent needs to handle best. A thorough journey map is the foundation of a well-built onboarding agent.
Define Agent Goals and Success Metrics
An agent without clear goals produces unclear results. Define exactly what success looks like before you start building. A common goal is reducing time-to-activation from five days to one. Another is achieving a ninety percent onboarding completion rate. Pick metrics that matter to your business and design the agent to move them.
Secondary goals also matter. You might want the agent to reduce inbound support tickets by forty percent. You might want it to collect customer data that feeds your CRM automatically. Layer these goals into your design from the start. Retrofitting them later costs more time and money.
Identify the Data Your Agent Needs
An AI agent is only as smart as the data it can access. Identify every data source your agent will need. This typically includes your user database, your product documentation, your CRM records, and your email or messaging platform. Map out what data the agent reads and what data it writes.
Data access shapes your architecture. If your agent needs to verify a customer’s identity, it must connect to your identity verification service. If it needs to explain a feature, it must access your knowledge base. Plan these connections early. They determine which tools and APIs you need to build around.
Choosing the Right Stack to Build Your Agent
LLM Selection
The large language model at the core of your agent drives its reasoning and communication quality. OpenAI’s GPT-4o is a popular choice for production onboarding agents. Anthropic’s Claude excels at following complex instructions and producing consistent, professional responses. Google’s Gemini offers strong multimodal capabilities if your onboarding involves images or documents.
Match the model to your requirements. If your onboarding involves nuanced legal disclosures that require precise language, Claude is worth considering. If your agent needs to handle diverse input formats quickly, Gemini’s multimodal abilities are relevant. For most standard SaaS onboarding flows, GPT-4o delivers excellent results.
Orchestration Framework
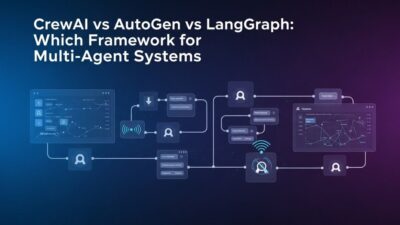
Your LLM needs an orchestration layer to manage state, tools, and multi-step reasoning. LangGraph is the strongest choice for complex onboarding agents. It uses a graph-based model that maps perfectly to multi-step workflows with branching logic. LangChain provides a rich library of integrations that accelerate development. CrewAI suits simpler onboarding flows where distinct agent roles handle different stages.
The framework you pick affects how you build a custom AI agent for automated customer onboarding at a technical level. LangGraph gives you explicit state management. This means your agent always knows where a customer is in their journey. It can resume a conversation after an interruption without losing context.
Tools and Integrations
An onboarding agent typically needs several tools to do its job. An email or messaging tool lets it communicate with customers. A CRM integration lets it read and write customer records. A document tool lets it handle uploads and verification. A calendar tool lets it schedule calls when human intervention is needed. A knowledge base retrieval tool lets it answer product questions accurately.
Build or configure each tool as a discrete component. Give the agent clear descriptions of what each tool does and when to use it. A well-defined tool set makes the agent more reliable. It reduces hallucinations because the agent calls a tool to get facts rather than guessing.
Building the Agent Step by Step
Step 1: Define the Agent’s Core Prompt
The system prompt is where you define your agent’s identity, role, and rules. Write it clearly and specifically. Tell the agent its name, its purpose, and the tone it should use. Specify what it should do and what it must never do. Include instructions about when to escalate to a human.
A strong system prompt might read like this: You are Alex, the onboarding assistant for Acme Software. Your job is to guide new customers through account setup, answer product questions, and confirm each onboarding step is complete. Always use a friendly, professional tone. Never share pricing information without confirmation from a human agent. Escalate to a human if a customer expresses frustration twice in a row.
Step 2: Design the Onboarding State
State management is what separates a real agent from a simple chatbot. Your agent needs to track where each customer is in the onboarding journey. Design a state object that captures this information. Common state fields include customer ID, current onboarding step, completed steps, collected data, and escalation flag.
With LangGraph, you define this state as a typed object. Each node in your graph reads and updates the state. This means every agent action is grounded in the current state of a specific customer. The agent never confuses one customer’s progress with another’s.
Step 3: Build the Workflow Graph
Map your onboarding journey into a graph. Each step becomes a node. Conditions become edges. For example, after a customer submits their profile, the agent checks if all required fields are present. If yes, the edge leads to the next step. If no, the edge leads back to a data collection node that asks for the missing information.
Common nodes in a customer onboarding graph include welcome and intent detection, account setup guidance, document collection, identity verification, feature walkthrough, first task completion, and activation confirmation. Build each node as a focused function that does one thing well.
Step 4: Connect Your Tools
With your graph defined, connect each tool to the nodes that need it. The identity verification node calls your KYC API. The feature walkthrough node calls your knowledge base retrieval system. The escalation node calls your CRM to log the interaction and alerts a human agent via Slack or email.
Test each tool connection independently before integrating it into the full graph. A broken tool integration is one of the most common causes of agent failures in production. Confirm that every API call returns the expected response format. Build error handling for each tool so the agent degrades gracefully when a service is unavailable.
Step 5: Add Memory
Short-term memory keeps the conversation coherent within a session. Long-term memory allows the agent to remember things about a customer across multiple sessions. Both matter for onboarding.
Short-term memory is typically handled by passing the conversation history to the LLM with each call. Long-term memory requires a vector database or a structured store. When a customer returns after a break, the agent retrieves their previous context. It picks up the conversation exactly where it left off. This continuity dramatically improves the customer experience.
Step 6: Build Human Escalation Pathways
No agent handles everything perfectly. Build clear escalation pathways from the start. Define the conditions that trigger escalation. These might include a customer expressing legal concerns, a tool returning an error three times in a row, or a customer explicitly requesting human help.
When escalation triggers, the agent should do three things. It should notify the appropriate human immediately. It should summarize the conversation so the human has full context. It should inform the customer that a human will follow up within a defined timeframe. Smooth escalation protects the customer experience even when the agent reaches its limits.
Testing Your AI Onboarding Agent
Unit Testing Agent Components
Test each component of your agent in isolation. Write unit tests for every tool function. Confirm that the state transitions fire correctly for each condition. Test your system prompt with a range of customer inputs to verify the agent responds appropriately in different scenarios.
Automated testing is essential for a production onboarding agent. Create a test suite that covers the happy path, common edge cases, and failure scenarios. Run this suite every time you update the agent. Regression testing catches issues before they reach real customers.
Simulation Testing With Synthetic Users
Before going live, simulate full onboarding journeys with synthetic user profiles. Create profiles that represent different customer types. A new user who completes everything smoothly. A user who submits incomplete information twice. A user who asks unusual questions. A user who requests human help midway through.
Run each synthetic user through your agent. Review the transcripts. Identify where the agent gave unclear responses or made wrong decisions. Refine the system prompt, the state logic, and the tool configurations based on what you find. This simulation phase prevents the most common production failures.
A/B Testing for Optimization
Once your agent is live, run A/B tests to optimize performance. Test different welcome messages. Test different ways of asking for required information. Test different escalation triggers. Small improvements in each interaction compound into significant gains in overall onboarding completion rates.
Use your success metrics as the north star for these tests. If your goal is faster time-to-activation, measure that metric across both variants. Let data drive your decisions. Intuition is a starting point. Evidence is what you deploy.
Deploying and Monitoring Your Agent
Deployment Options
Your agent needs a reliable hosting environment. Cloud platforms like AWS, Google Cloud, and Azure all support the infrastructure needed to run production AI agents. Containerize your agent using Docker for consistent deployment across environments. Use a managed container service like AWS ECS or Google Cloud Run for scalable production hosting.
Your agent also needs an interface. Common deployment surfaces for onboarding agents include in-app chat widgets, email-based flows, SMS conversations, and web portals. Match the interface to where your customers already are. If your customers sign up via a web app, an in-app chat widget is the most natural fit.
Observability and Monitoring
A deployed agent that you cannot observe is a liability. Set up logging for every agent interaction from day one. Capture the full conversation transcript, the tool calls made, the state at each step, and the final outcome. Store these logs in a searchable system.
LangSmith is the leading observability platform for LangChain and LangGraph agents. It lets you trace every step of an agent’s reasoning, inspect tool calls, and measure latency. Set up dashboards that track your key metrics daily. Onboarding completion rate, average session duration, escalation rate, and customer satisfaction score should all appear on your monitoring dashboard.
Continuous Improvement
An onboarding agent improves over time when you actively manage it. Review a sample of transcripts every week. Look for patterns in where customers get confused or frustrated. Update the system prompt and state logic to address these patterns. Add new tools when you identify gaps in the agent’s capabilities.
Treat your agent like a product. It needs regular updates, performance reviews, and strategic improvements. A well-maintained agent gets better every month. A neglected one becomes a liability. Schedule a monthly review of your agent’s performance as a standing team commitment.
Common Mistakes When You Build a Custom AI Agent for Automated Customer Onboarding
Many teams make the same mistakes the first time they build a custom AI agent for automated customer onboarding. The most common is skipping the journey mapping phase. Jumping straight to code without understanding the existing process produces an agent that automates confusion rather than resolving it.
A second common mistake is underestimating tool reliability. Agents depend on external services. When those services fail, the agent fails too. Teams that do not build robust error handling ship agents that break in front of customers. Every tool connection needs a fallback behavior.
A third mistake is writing a vague system prompt. Vague instructions produce inconsistent agent behavior. The more specific your system prompt, the more predictable and reliable your agent becomes. Spend serious time on this document. Treat it like product requirements, not a casual instruction note.
A fourth mistake is ignoring memory. Onboarding often happens across multiple sessions. A customer starts setup on Monday and returns on Wednesday. An agent without long-term memory treats that Wednesday visit as a first interaction. The customer has to repeat themselves. That experience kills trust immediately.
A fifth mistake is launching without a feedback loop. You will not catch every problem in testing. Real customers surface unexpected behaviors. Build a mechanism for collecting feedback from day one. A simple thumbs-up or thumbs-down on each interaction gives you a continuous signal to improve against.
Advanced Capabilities to Add Over Time
Proactive Outreach
A basic onboarding agent responds to customer messages. An advanced agent reaches out proactively. If a customer has not completed a step after twenty-four hours, the agent sends a nudge. If a customer completes a step faster than average, the agent accelerates to the next one. This proactive behavior shortens time-to-activation significantly.
Personalization at Scale
Use customer data to personalize every interaction. An agent that addresses a customer by name, references their industry, and tailors feature explanations to their specific use case creates a far better experience than a generic flow. Pull data from your CRM at the start of each session. Feed it into the agent’s context. The difference in customer response is immediate.
Multilingual Support
Modern LLMs handle multiple languages well. If your customer base spans multiple countries, add multilingual support to your agent. Detect the customer’s preferred language early in the conversation. Respond in that language throughout. This capability removes a major barrier for international customers and expands your addressable market.
Analytics and Insights
Your onboarding agent generates valuable data. Analyze conversation patterns to understand what features confuse customers most. Identify which onboarding steps have the highest drop-off rates. Use these insights to improve both your agent and your product. An agent that doubles as a research tool is a significant competitive advantage.
Frequently Asked Questions
How long does it take to build a custom AI agent for automated customer onboarding?
A basic onboarding agent takes two to four weeks to build and deploy. A complex agent with multiple integrations, identity verification, and multilingual support can take eight to twelve weeks. The timeline depends on your existing infrastructure, the complexity of your onboarding flow, and your team’s familiarity with AI development tools.
What is the cost to build a custom AI agent for automated customer onboarding?
Development costs vary widely. A small team using open-source tools and cloud LLM APIs can build a solid agent for ten to thirty thousand dollars in development time. LLM API costs at runtime depend on usage volume. For a company onboarding a thousand customers per month, LLM costs typically run between two hundred and eight hundred dollars monthly depending on conversation length and model choice.
Can a small company build a custom AI agent for automated customer onboarding?
Yes. Small companies often benefit most from onboarding automation because they have limited staff to handle manual processes. Modern frameworks like LangChain and LangGraph are well-documented and accessible to developers with standard Python skills. Cloud LLM APIs remove the need for AI research expertise. A single developer can build a working onboarding agent.
What integrations does an onboarding AI agent typically need?
Most onboarding agents need a CRM integration, an email or messaging platform, a knowledge base, and a product database. Regulated industries add identity verification and document management integrations. E-commerce companies often add payment processor integrations. The specific integrations depend entirely on what your onboarding process requires.
How do I ensure my AI onboarding agent is compliant with data privacy regulations?
Data privacy compliance starts with architecture decisions. Store customer data in compliant infrastructure. Implement data minimization principles so the agent only accesses data it needs. Log what data the agent accesses and why. Work with your legal team to review the agent’s data handling before launch. Add explicit consent steps within the onboarding flow where regulations require them.
How do I measure the success of my onboarding AI agent?
Track five key metrics from launch day. Onboarding completion rate measures what percentage of new customers finish the full onboarding journey. Time-to-activation measures how long it takes from signup to first meaningful product use. Escalation rate measures how often the agent hands off to a human. Customer satisfaction score measures how customers feel about the experience. Support ticket volume from new users measures how many questions the agent fails to answer. Improve each metric over time.
Read More:-Common Mistakes When Implementing Vector Searches
Conclusion
Customer onboarding sets the tone for the entire customer relationship. A slow, confusing, or inconsistent onboarding experience damages retention before it starts. The decision to build a custom AI agent for automated customer onboarding is a decision to take that experience seriously.
This guide covered the full process. You now understand how to map your onboarding journey, choose the right stack, build the agent step by step, test it rigorously, deploy it properly, and improve it over time. The technical pieces are available to any development team today. The frameworks are mature. The LLM APIs are reliable. The infrastructure is affordable.
What separates companies that succeed at this from those that do not is commitment to the details. A strong system prompt, a well-designed state object, reliable tool integrations, and a disciplined monitoring process are what make an agent excellent. Cutting corners on any of these produces an agent that frustrates customers instead of serving them.
Start with a focused scope. Pick one part of your onboarding flow that causes the most friction. Build an agent that handles that part exceptionally well. Measure the results. Expand from there. The path to a fully automated onboarding experience starts with a single, well-built step.
The companies investing in AI-powered onboarding today are building a durable competitive advantage. Customers notice when onboarding is effortless. They remember it. They talk about it. Build a custom AI agent for automated customer onboarding and make your first impression count every time.